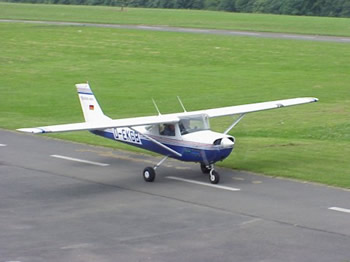
Nose-wheel
Conventional gear aircraft fly much the
same as tricycle aircraft. It is the landings that require special instruction
and endorsement. This is because of the predilection to ground loop. Tricycle
aircraft will align with the direction of travel if weight is kept off the nose
wheel. There is a significant design difference of the nose wheel between Cessna
and Piper. On the ground, Piper steers heavily and positively; Cessnas have
springs that will gradually pull the wheel into the turn. The left and right
turning springs of the Cessna are usually of different tension. This means that
more differential toe braking will be required in one direction than in the
other.
In the air, a Cessna nose wheel
will hang down about a foot. This frees it from the socket that has the turning
springs. The Cessna nose wheel will face forward and not move with the rudder.
In a cross-wind landing the Cessna nose wheel is aligned with the direction of
aircraft motion. The nose remains so aligned even in a cross-control landing.
Again, the nose wheel should not be allowed to touch down during the initial
landing but only because it is not designed to with stand such shock. The
turning springs of the Cessna will not function until the nose wheel strut is
sufficiently compressed. If you make a landing that seems to prevent steering
except through differential braking, apply the brakes to compress the nose
strut. The nose wheel geometry of Piper aircraft is completely different. (See
nose-wheel landings and Piper)
The Cessna's nose steering is
coupled to springs, and it's only movable 10 degrees) either side, unless
differential braking is used. Braking will then caster the wheel to 30 degrees.
C-150
Flaps
The C-150 has slotted Fowler "barn
doors" that, along with inadequate instruction, caused the C-152 to be "improved
(?)" with only 30 degrees of flap extension. Flap speeds should never be
exceeded since they put structural strain on the wings' rear spar. In most
Cessna a 10-knot buffer below the high end of the white arc has much to
recommend it. Any parasitic drag caused by flaps increases as the square of the
speed. In some cases 10 degrees of flap may be used for takeoff but they should
be removed at a safe altitude to improve climb performance. The reduction in
flaps extension also allowed a higher gross weight to be allowed.
C-150 flaps have evolved from
the Piper like Johnson bar through various flap switches and indent levers. Be
careful, some switches work 'backwards'. The later models of the C-150 have
electric flaps with indicators marked in 10 degrees to 40 degrees. There is a
flap-shaped switch, which applies power to an electric motor and a worm gear to
the flap-actuating rod. Extension takes about nine seconds and airstream
assisted retraction takes about five seconds. Any count system used to move
flaps should be figured accordingly. The flap indicator works on a cable +
pulley system which has variations in accuracy. Different year models of the
C-150 and all other models have different modes of switch operation. Be sure to
check method of operation before flight and during checkouts.
A C-150 after landing with full
flaps will be trimmed for level flight and will require 1 trim down movement of
the wheel for climb. The C-172 will be trimmed for climb and will require 1
trim+ for levelling off. Most Cessnas do not recommend flaps for short field
takeoff where Vx is required to get over an obstacle. Getting off the ground
early will not help you get UP. The C-150 can have an abrupt pitch up when full
power is applied in a full flap configuration. This could result in a departure
type stall. The nose must be prevented from rising above the horizon by locking
the elbow before applying any power. See "Go Around.
Trim and the C-150
From cruise trim to best rate climb
is one full trim down not be pinching but finger tip at very top to very
bottom.. From cruise to 1500 rpm four finger tip trims down and then back to
2000 rpm gives no flap minimum controllable. The same operation with only three
trims down gives no flap slow flight at 60 knots. The same operation again but
leaving the power at 1500 gives a 60 kt descent. The transition from pattern
slow flight to descent requires only a reduction of power, easy.
Every 10 degrees of flap has a
one to one relationship to a full finger tip turn of trim from the above
configuration. From the 60-kt 1500-RPM power glide an application of 10 degrees
flap lowers the speed to 50 kts. A full finger tip trim movement up returns the
speed to 60 kts. 20 degrees does the same, as will 30/40 degrees. When doing
this process with a student for the first time be sure to bring to their
attention that you are in a descent. Demonstrate how the addition of power can
stop at any given point. Descents are an early source of student anxiety as are
clouds, mountains, bumps, water, etc, etc.
A Cessna 150 has nearly the same
trim setting for level cruise flight as is needed at 1500 RPM, full flaps and 60
kts descent. Thus, the full flap short approach requires no change in trim
unless power is off. This setting is constant for nearly every loading. The
instructor will help the student determine this initial setting. If the C-150
has been landed with full flaps it will be near the correct setting for level
cruise but not for takeoff climb. From this starting point of the trim wheel the
following apply:
1. For a takeoff climb at 65 kts,
the C-150 trim wheel must be moved down one full finger tip turn from the full
flap landing/level cruise position.
2. To level off from this climb it must be moved up one full finger tip turn.
3. Three full down finger tip turns from level will give descent at 60 kts at
1500RPM.
4. Trim down four finger tip turns for a no flap glide at 60 kts with power off.
5. Trim full down four finger tip turns for minimum controllable without flaps.
About 2000 RPM no flaps.
6. For full flap slow flight or minimum controllable trim up one finger tip
turn. Full power.
7. Most Cessnas have one full finger tip turn of the trim between level and
climb settings.
8. In each case fine trim movement may be required.
Removal of the flaps during the
go-around finds you trimmed for level cruise. One full finger tip trim down will
give Vy climb at 65 knots. This same procedure can illustrate why, when making a
short approach, reduction of power to 1500 and application of full flaps at the
white arc will give you a hands-off approach speed of 60 knots.
Basic Manoeuvres
Climbs are initiated by simultaneous
power. Pitch change and right rudder. Always anticipate that power and pitch
will require right rudder so as to avoid those annoying 10-degree heading
changes to the left. After initial pitch change and trim application, adjust
pitch and trim for desired climb airspeed or rate. A constant airspeed over
several thousand feet of climb will result in a gradually lower rate of climb. A
constant rate climb in the same climb will result in a gradual decrease in
airspeed.
Climbing Turns
… require that you anticipate…
1. More right rudder in right turns
2. Less right rudder in left turns.
3. Lower ias at same pitch variable with bank angle and power available.
4. Lower climb rate at same pitch variable with bank angle and power used.
Levelling off is best done by
leading the selected altitude by 10% of the climb rate. Anticipate additional
climb by trimming a full turn and hand-holding altitude during the acceleration
phase before power reduction. Failure to reduce power on reaching level cruise
speed is guaranteed to give altitude and airspeed oscillations that are going to
be difficult to correct.
Descents
… during approach and cruise are nearly
the same…
1. Lower power and decrease pitch. Watch heading.
2. Expect ias to increase. Reduce power.
Descending Turns
.. anticipate…
1. Higher bank angle will cause increase in descent rate at same
airspeed.
2. Required left rudder to increase in left turns.
3. Less left rudder in turns to right.
4. Airspeed will increase at same pitch attitude.
5. Same airspeed and power increase will reduce descent rate.
C-150 as a Glider
… without hope of restarting engine: Immediately...
1. Airspeed to best glide-near best rate climb (Move trim wheel down as far as
it will go.)
2. Below gross glides are 5 knots slower
3. Determine field and wind
4. Mixture out, fuel off
5. Magnetos off
6. Stop the prop
Pre-crash
1. Master off
2. Unlatch doors
3. Seats all the way back and locked
4. Tighten belts
5. Cover panel with padding
Consolation
1. Few controlled accidents result
in fatalities (5.2%)
2. Panic will not solve anything
3. Upslope landing if possible
Precision Slow-flight C-150
Slow Flight--Any speed below normal cruise. Precision exists where you chose
to place it. An airspeed 1.3 of power off, flaps up stall speed is one such
speed used for landing approaches. Where the POH states a range of speeds, you
should always practice at the lower number. Select a speed above and below the
POH speeds for approach and practice manoeuvres at these speeds. Excess speed is
very common on landings. Trim is the basic control of flying precision. Any
change in power, speed, or configuration requires a trim adjustment. As a
student you should strive for certain standards. 10-degrees of heading, 10-knots
of airspeed, and 100-feet of altitude, as a pilot you should maintain 5, 5, and
50, and as a precision flyer you should reach 2, 2, and 20. The more you
practice changing through the range of slow-flight speeds the better you will be
able to anticipate the trim changes and power setting required. The sound and
feel of the aircraft are a good indicators to notice and learn.
No Flap Slow-Flight
Clearing turns
Carburettor heat
Power to 1500
Use yoke to prevent any sink during deceleration
Set power to 2000
Trim four finger tip turns for minimum-controllable at 45 knots.
Trim three finger tip turns for slow flight at 55 knots.
Fine trim for airspeed
100 rpm gives one-knot airspeed change
Retrim for all power airspeed changes.
C-150 POH
1976 Cessna 150 Required Information
Conditions are standard, and weight at gross unless otherwise stated.
Maximum Range and endurance with 45 minute reserve
@ 7000' 340 NM for 3.3 hours Clean stall 48 KIAS
Sea level climb 670 fpm .......Flap stall 42 KIAS
Service ceiling 14,000'
Service ceiling is the maximum altitude at which an aircraft can continue to
climb 100 fpm. The safety margin between the highest terrain and the service
ceiling should be at least 5000'.
Absolute ceiling is the maximum altitude an aircraft can attain. At this point
the cruise speed, best climb speed and stall speed all equalize. The aircraft
becomes unstable and controls are unable to stabilize flight.
T.O. S.L. Ground Roll 735 Fuel 26 total 22.5 useful
......Over 50' 1385 Oil maximum 7 with filter
Landing Ground roll 445 6 maximum indicated
.....Over 50' 1075 4 minimum indicated
Maximum Gross Weight 1600 lbs
Wing Span 32? Prop length 69"
Wing Loading 10.0 lbs per squat. ft.
Power Loading 16.0 lbs per horsepower
Va (Manoeuvring speed) 97
KIAS @ 1600lb 88 KIAS @ 1300 lb.
Vfe 85 KIAS
Vno Structural cruise speed 107 KIAS
Vne 141 KIAS
Vs Minimum controllable
Vso Minimum controllable (with forward C. G.)
Vx best angle 56 all altitudes
Vy best rate S. L. 68 to 62 @ 10,000'
White arc 42 to 85
Green arc 47 to 107
Yellow arc 107 to 141
The bottom of the yellow arc
represents the airspeed where the airframe can sustain a specific design gust
without exceeding the limit load. This means the plane will not fold, spindle or
mutilate if the gust is less than the maximum design gust of 50 feet per second
(30 on older planes).
Red line @ 141 KIAS
Chandelles, lazy-eights, steep
turns and spin entries 95 Kts. Spins are prohibited with flaps down.
The red panel light on the far
right indicates high or low voltage. The split switches can act as a circuit
breaker to protect the system Reset by operating switches off and back on. Do
this only one time.
Maximum glide speed is 60 KIAS
and windmilling prop
What if prop is stopped?
Power off landings: Without
flaps @ 65 KIAS
With flaps @ 55 KIAS
Ground fire procedures?
Electrical fire procedures?
Glide range (no wind) at 60 KIAS
@6000' 8 NM
@3000' 4.5 NM
Altitude required to execute
power off 180 degree turn.
Altitude required to execute power off 240 degree turn.
Carburettor Ice as affected by
application/removal of carb heat.
Short field approach speed with
40 degrees of flaps is 52 KIAS
Maximum crosswind component is
13 Knots.
Figure fuel remaining in C-150
for flight from CCR to RNO.
What is the maximum weight
authorized for the luggage compartment.
At gross weight the allowed C.G. travel is only five inches.
Fuel Consumption
Fuel consumption will vary widely
from those of the aircraft manual. Cessna 150's have been known to consume up to
9 gallons per hour. A PA-28 180 can be out of fuel in 3 1/2 hours, from full
tanks, if the carburetor is out of adjustment. Failure to know the current, as
loaded, fuel consumption is just as dangerous as not checking the tanks in the
first place. The psychological readiness of a pilot is in a large part made up
of his intellectual awareness of aircraft and his own capabilities. Be on the
ground after three hours.
For a Cessna 150, with a 100HP Continental O-200.
Climb. 100/10 = 10 gallons per hour. Leaned 8.3
Cruise 75/10 = 7.5 gallons per hour. Leaned 6.3
Descent 50/10 = 5 gallons per hour. Leaned 4.0
Fuel Gauges
By FAR the fuel gauges are required to read accurately only when the
tanks are completely full OR empty. When the gauge reads at the quarter full
marker on both tanks the manufacturer says there are only three gallons of fuel
left. At best this is about 20 minutes worth.
Building a Checklist
The AFM checklists are skimpy without radio procedures and settings.
Just as we update the weight and balance forms so should the checklist be
updated to account for changes of procedure and addition of switches
and instruments in the cockpit.
Single pilots are most prone not
to use checklists in familiar airplanes. Pilots are likely to use the checklist
when things are easy. A distraction is the most likely reason for a pilot to
neglect using the checklist. When there is too much to do and too little time to
do it. A checklist that is unavailable, too long, and inefficient is the one
most likely never to be used.
The single pilot should develop
a flow pattern which is more organized than is the 'reading the checklist'
method. The flow is a planned series of actions that begins at one point and
proceeds through a pre-selected number of items to the last point. The number of
items should never exceed the fingers on both hands and ideally uses only one
hand. The flow and numbering insures that everything is done in an efficient
manner. The items and flow are aircraft specific.
Finger-flow Checklist
1. Every required item must be included along with a finger.
2. Flows are best during the 'busy' times.
3. Flows should be segmented for areas of flight.
4. Flows should be logical and items should be touched.
5. Flow should be verbalized (Say aloud what you are doing)
6. A flow checklist is not for the infrequent flyer.
7. A flow checklist is not a substitute for a written checklist.
The transition to a higher
performance aircraft will bring into the situation the good, bad, and ugly
habits that have been learned while in training. Essential to any transition is
use of trim, throttle, and airspeed control.
The POH checklist is designed to remind the pilot of the minimums required for
safe operation. It is a memory aid used to overcome short-term memory loss. The
checklist places in order a number of actions or procedures that require action
or verification. A checklist is not a "how-to" manual. A checklist is a roadmap
of what is to be checked.
A checklist has items ranked in importance. Critical items affect safety,
non-critical items affect efficiency and convenience. A checklist title for a
given phase of flight would identify when the critical items are to be checked,
list them in an orderly sequence, and provide for verification. This touch and
verify method is recommended by the FAA for single pilot operations. The
non-critical item list should be triggered by the completion of the last
critical item.
Checklists should be done when
they will least cause flying problems. A heads-up positioning of the list is
best. The closer you are to making the landing approach the less likely will be
the completion of a checklist.
Checklist Errors
… are of at least five types.
1. The list is ignored
2. A critical item is omitted
3. Verification is falsely noted
4. Use of the list is delayed
5. The list is not completed
Once you have developed a
complete checklist, you should begin to refine and systematize the material over
and over. The list of items should be shortened, combined, and revised until it
actually fits into your flying as something you usually do, in the order you do
it, and when you do it.
The emergency checklist should
be a memorized for immediate action. Do what you need to do and then use the
list to verify that nothing has been omitted. An inaccessible emergency
checklist is useless.
Sample recommendations:
1. Use laser or jet printer if possible
2. Extended text should be in lower case.
3. Limit to 2 types of font for emphasis
4. Use black on white except for emergency
5. Avoid multi-colours except for different aircraft types
6. Laminate (after fifth revision) with non-glare plastic
7. Print size should vary with age of pilot.
Short Field Landing Distances
C-150
Take Off 735' /50' 1385 Landing Distance 445 /50' 1075
C-172
Take Off 945 /50' 1685 Landing Distance 550 /50' 1295
C-182
Take Off 795 /50' 1625 Landing Distance 545 /50' 1285
An airplane should not be
expected to get out of a space where it has landed.
Performance Synopsis
Cessna-back of front cover:
Weight, speed, range, climb.
Service Ceiling, take-off, landing, stall
Empty weight, useful
Fuel, oil, propeller, engine
OPERATION:
Checklists
Preflight to post-shutdown
Fuel system-cautions/operation
Electrical system-cautions/operation
Gear system-cautions/operation
Engine system-cautions/leaning/operation
PERFORMANCE:
Take-off/landings/flap settings/gear
Climb/cruise/cold/hot
C-150 Take Off 735' /50' 1385 Landing Distance 445 /50' 1075
EMERGENCY:
Engine/fire/electrical/gear
LIMITATIONS:
Gross/load factors/speeds/engine
Weight-balance chart/graph
OPERATIONAL DATA:
Airspeed corrections
Stall speeds
Takeoff/climb/landing charts
Cruise/glide
1. Don't try to climb to 9,500
in a C-150 unless you must. A C-150 flight to Las Vegas can be a 12 hour
roundtrip regardless of wind direction.
2. Select an altitude
appropriate to the distance. Avoid 3000'. Remember local flights tend to stay
below 3000. No need to go high for short distances. Most pilots tend to fly at
even 500s even below 3000. Choose a unique altitude so as to avoid traffic.
Above 3000 AGL you must fly according to the hemispheric rule. Fly at 7,500 or
8,500 to minimize traffic conflicts but be aware when you cross, parallel or fly
airways. Be sure to check with FSS prior to flight or with Flight Watch if your
flight will cross military training routes.
3. Choose an altitude
appropriate to the terrain and airports. This means that route selection may be
predicated on several factors.
4. Select an altitude
appropriate to the winds. Winds usually increase in velocity with altitude. Plan
accordingly.
Select an altitude with
reference to special airspace restrictions, local hazards and cloud layers. (It
is more likely to be a rough flight below clouds.)
LANDING (C-150)
Prelanding check( Go-around procedure)
Abeam the numbers:
Cruise power/IAS
Carb Heat
Pwr 1500/1700
Hold heading/alt
Trim Down 3
Fly 60/70
10 degree flaps 1-2-3-4-
Yoke forward
Trim UP 1
Fly 60/70
Pwr 1500
Clear
Turn base
20 degrees 1-2-3-4
Yoke forward
Trim UP 1
Fly 60/70
Pwr 1500
Clear
Turn final
Full flaps 1-2-3-4-5-6-
Yoke more forward
Trim up l (172 no change)
Fly 60/60
C-150 Rudder Jamming
After becoming aware of the locked rudder accident, the manufacturer
(Cessna) notified TSB investigators that it is developing a new design for the
rudder horn stop bolt to preclude the possibility of over-travel of the rudder.
Cessna has notified the Federal Aviation Administration (FAA) Aircraft
Certification Office that it is developing a service bulletin to offer the new
configuration for all models of 150s and 152s produced after 1966.
Rudder Jamming Problems
According to the FAA, a CFI and
Student were killed when they were unable to recover from a training spin due to
rudder horn jamming. During a 50-hour check the day before the accident, the
right pedal rudder bar return spring and its lever arm were found to be broken
on the accident airplane.
These broken pieces of the
rudder control system were removed without replacement. On completion of the
50-hour checks, the airplane was returned to service with no reference to the
outstanding defect, recorded in the logbook. On the surface this accident would
appear to be more a result of the missing parts than a design defect, but the
FAA believes it is possible for similar jams to occur, even when the rudder
control assembly is complete and intact. We have been unable to verify the
specifics of this accident as the details do not appear in the NTSB record.
According to the Cessna Pilots Association, the accident in question occurred in
1998, leaving us wondering why it has taken until 2000 to issue an alert.
C-150
Glide
Weight has no effect on best glide
ratio. However, the speed to be used will vary by weight. The lighter the
aircraft the slower the best glide speed. For every 10% of weight reduction,
reduce the glide speed by 5%. Ground speed should be increased by at least 1/3
of any headwind to improve penetration distance. When distance is unimportant
you should glide at a minimum sink speed. 50 mph will give a sink rate of only
600-fpm. You will get an additional twenty seconds in the air for every thousand
feet of altitude.
From 12,000' a C-150's 70 mph
indicated is only 84 true air speed. Power off sink rate is 870 fpm reducing to
725 at sea level. Another 20% of glide distance can be obtained by pulling into
a near stall and stopping the propeller. To restart the propeller without using
the battery will take a dive speed in excess of 120 mph.
Fuel Problems of Cessnas
Significant fuel imbalance has been
explained away as due to overflow venting pipes being pressurized by air in
flight. However, it has been found to be due to fuel tank sealant obstructing
fuel tank vent lines as well.
See Cessna service bulletin SEB 99-18
C-150 Production
22,138 total U.S. production (734
Aerobats
(6943 C-152s)
Produced from 1957 til the 1977 C-150M
Cessna vs Piper
--Seat belt systems are somewhat different.
--Flap relationship to trim is unique one from the other.
--Best to have your own POH for every aircraft you fly.
--Most of the checklist items will have a different sequence
--The first item of your emergency checklist will be different.
--Manufacturer's instructions related to carburettor heat differ.
--Night and cockpit lighting systems require distinctive explanations.
--The manoeuvring and taxiing blind spots are usually quite different.
--One door system is more likely to accidentally open as the other is.
--Cross wind and ground handling in strong winds distinctly different.
--One flap system is more controllable and consistent than the other is.
--Seat adjustment systems are just different enough to cause difficulties.
--Never plan to immediately fly hard IFR in a newly transitional aircraft.
--The way you hold your hands on the throttle should be quite different
--One fuel system is twice as likely to cause an engine failure as the other is.
--POH numbers and explanations vary year to year and even within the
year.
--You should always make your own aircraft specific operational checklist.
--Confirm the 'neutral' position of the trim setting indicator with actual
trim position.
--Learn all you can about the failure modes of all unfamiliar instruments in
either type.
--Gear retraction and extension of one is less likely to give problems than the
other is.
--The way you use the rudder pedals and brakes have a VERY dangerous difference.
--The preflights are distinctly different with differing critical points where
mistakes occur.
--Get some pre-flight cockpit time for reading the POH and referencing the
cockpit to it.
--Run the trim wheel all the way up and down, manually and electrically to
become familiar.
--Within the same models of each manufacturer there are wide critical airspeed
differences.
--Both manufacturers have made wing, elevator and instrument changes affecting
critical speeds.
--Distinct differences in handling when at gross and near either end of the
centre of gravity range.
--With two exceptions, one type is more likely to have a stall/mush accident in
all its models than the other is.
Aircraft Proficiency Checkout
Preflight
Removal and storage of cover
Checking time log/pitot cover and control lock storage
Cargo doors not to be slammed.
Refuelling procedures
Location of POH/weight/ balance and aircraft papers.
Cockpit lighting
Starting procedures
Priming without throttle
Propwash effects behind
Detecting carburettor ice
Taxi procedures
Mixture leaning
Power vs brakes
Controls set for wind direction
Run-up
Facing wind or local requirements
Use of hand brake/foot brakes
Magneto check drop comparison
Clearing fouled plugs
Pre takeoff
Clearing the bases and final
Confirming power available
First power reduction at 1000'
Levelling off
Allow acceleration before power reduction|
Setting 75%, rpm and leaning
Trim and use of auto pilot (Operation and failure modes)
Heading and altitude control
Coordination of flight
Radio Procedures
Initial call to ATC and follow-up
Non-tower airport operations (Pattern operations)
Light systems
Manoeuvre
Steep turns
Slow flight
Stall recognition/recovery
Emergency procedures
Simulated engine failure
3 take offs and landings to include
No flap
Short approach
Short and Soft
Full flap go-around